Another day, another organized drawer. Yesterday’s home office drawer was just what I needed to boost the functionality of today’s drawer. With the boys starting school this week, we were in need of an organized school supply drawer to give them all of the necessary homework tools for a successful year. In the past we have purchased each boy individual sets of supplies and stored them within their own personal study boxes. Although the boxes work fairly well for a good part of the year, eventually supplies start missing, the boxes are left all over our home and cars and the contents become so jostled that they are no longer helpful to the boys. Now that we have a set of drawers near our dining room table (where our younger boys do their homework), I wanted to dedicate one of the drawers to their studies. This way I only had to purchase a single set of supplies and could expand the contents of the drawer to the types of items we found we needed during previous school years.

So as part of the Four Days & Four Drawers challenge, I knew it was perfect timing to get this drawer in top working order.

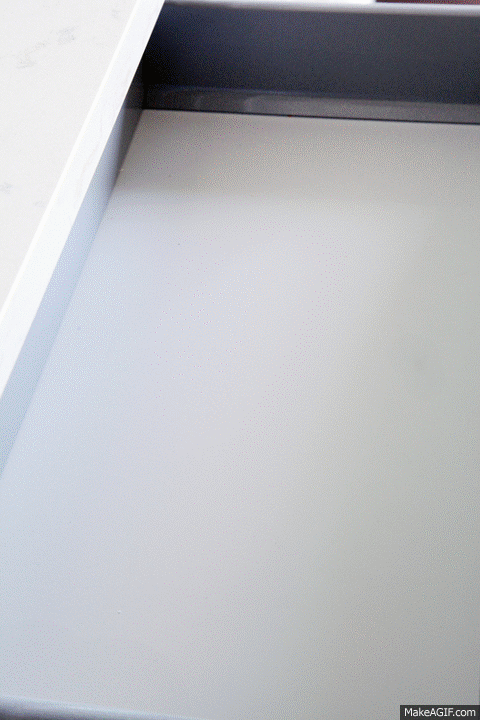
Because this drawer is new-to-us, there are no messy before pictures today. Just a blank slate.

The first step was to gather all of the supplies and dedicate organizers to fit those supplies. I went with my go-to dividers because they come in a variety of sizes to customize our layout (and once again, I love the durability, versatility and cleanliness they provide). Here is another fun animation to show the evolution of the main portion of the drawer (I think I am officially in love with .gif making).
This time around I just lined the drawer with some blue cardstock to anchor the acrylic and colorful supplies. After the initial set of organizers went in, I started getting happy goosebumps.

However, as I started planning this project, I realized that I had more supplies than I had room for in my drawer. I also realized that the amount of organizers and dividers I had were not all going to fit. These drawers are not as deep as what I am typically use to, measuring in at 9 ½" deep x 20 ½" wide. I had room for one set of dividers, but still had two more trays to factor in. But that is why yesterday’s project was a good place to begin, because the concept allowed for me to re-think how to make the most of today’s drawer.
What worked so well for me yesterday, was the ability to add a second layer of organization that still allowed me to easily access the first layer. The specific organizer I utilized with my filing cabinet drawer was not going to work for this setup, but that didn’t mean I couldn’t try to replicate the concept.
One “tray” was intended to hold loose leaf paper, a blank notebook and a few stacks of memo pads for extra note taking and scribbles. The tray was actually just part of an inexpensive acrylic box picture frame. The other tray was an organizer I picked up awhile back at HomeGoods and was nicely divided into smaller sections for those smaller items.

See how those two trays are now have enough clearance to place items below? The process was much more simple than I initially had planned. I am so excited about this!
Step one was to measure the width of the drawer and determine the height for the new trays to easily glide (and offer clearance for the items below). Once we had our measurements, we found a piece of scrap wood to cut to size.

Because our IKEA drawers have an odd angle where the bottom joins the walls, we cut the ledge at a 45 degree angle.

Like a glove!
Wanting a nice finished appearance that would just blend in with the face of the drawer, I grabbed some white vinyl (typically used with my die cutting machine). I could have also used paint, but didn’t want to risk a sticky finish.

I then found some adhesive mounting strips that I cut and stuck to the front of the drawer.


Ten minutes later I had an edge for my organizers to sit and slide on.

The back of the trays rested nicely on the back side of the drawer (but we easily could have mimicked this idea on the back side if necessary). To prevent them from falling behind the drawer, I added some sticky feet to the bottoms.


And now we have double the school supply storage area in a single drawer.

Here is a side angle to show the drawer closing without any height issues or hangups.

Another animation? OK!
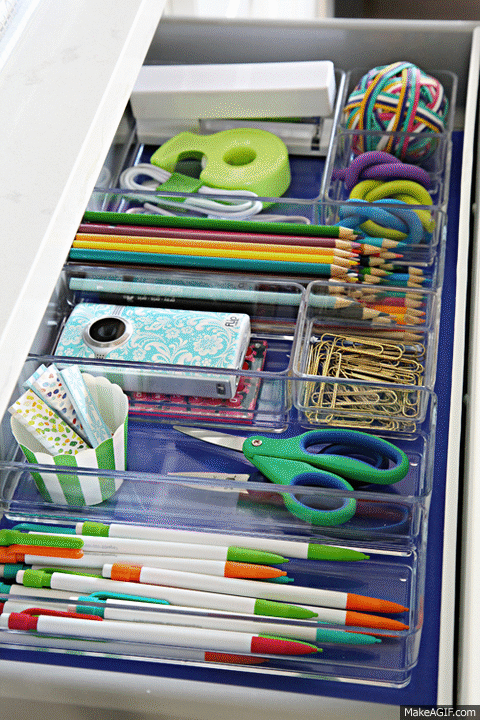
Here is a detailed list of the contents of our study drawer:
- Mechanical pencils
- Scissors
- Page flags
- Calculator
- Flip cam (for school projects)
- Paperclips
- Colored pencils
- Charging cords/brick
- Tape
- Erasers
- Stapler
- Rubberbands
- Ruler

- Sharpie
- Highlighter
- Pens
- Large Paperclips
- Small Paperclips
- Earbuds
- Glue sticks
- Pencil sharpener
- Stopwatch/timer
- Washi tape
- Butterfly clips

- Loose leaf paper
- Spiral notebook
- Memo pads

Everything is easy to find and I love that the organizers can swiftly move to the table and be put right back. I have a feeling this is going to become the most utilized drawer in our home. One day in and it has already been a definite hot spot for our boys.
Don’t forget that you can join in on the challenge with me! Small organizing projects are contagious and motivating and I am still on fire to tackle to more drawers. I hope some of you are excited to take on a drawer or two as well. Friday will be “link up” day and you can also share your photos with me anytime via Instagram with the #4drawers4days hashtag.
from IHeart Organizing http://iheartorganizing.blogspot.com/2015/08/four-days-four-drawers-mini-organizing_26.html
No comments:
Post a Comment