It is no secret that organizing and labeling go hand-in-hand. It is also no secret that I love to share my labeling tips with you. That is how the Labeling 101 series was born.
Does organizing have to be pretty to be effective? Absolutely not. But I always say, “Why not love it, have fun with it, and find ways to keep yourself motivated?" Any time that I have invested a little extra heart and attention to a project, it lasts much, much longer.
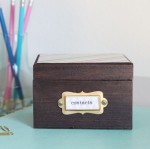
That said, when it comes to labeling, I prefer to add a little ooh, la la value. Whether it be a label made on our computer, or placed inside of a decorative bookplate or even created with my label maker, I want it to stick around for awhile and look the part.

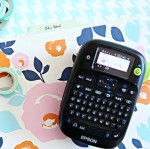
Over the years I have shared a variety of projects that include vinyl labels created with the help of my Silhouette die cutting machine. Below are a few popular examples:

As you can see, my Silhouette has helped me label countless bins, organizers and containers in a variety of darling ways. And when I recently named it as one of my top recommended tools, I received quite a few requests for some Silhouette specific tutorials.
I admit, pulling the Silhouette straight out of the box was extremely exciting until the moment came to figure out how to use the thing. Then, the sweaty palms and overwhelming butterfly belly set in.
My biggest tip for learning how to use your machine is to watch a few YouTube tutorials and to always read the directions on the Silhouette media packaging (the packaging for the vinyl, sticker paper, gold foil paper, fabric transfer material, etc. It generally has easy to follow step-by-step directions).
I recently had a couple of new vinyl labels to create, so I thought I would dust off my ol’ pal and put it back to work. Remembering your requests, I decided to also post the steps I take to whip up those fancy pants labels time and time again.
Let’s dive right in.
The first step is to plug in your machine, open the Silhouette Studio program loaded on your computer and make sure the software is up to date (it will tell you if it is not).

I always begin in Design mode, which pulls up a blank canvas for your project.

I like to think of the Silhouette as a printer and the Design Page Settings are similar to setting up typical printer page settings; selecting media/page size and orientation. When working with vinyl, you will also want to be sure that you select None for the Cutting Mat option. I like to Show Cut Boarder as the red line ensures I don’t place any graphics in a "no cut” zone.
Now it is time to design the label. The lovely thing about the Silhouette Studio is that it imports all of the fonts on your computer. Creating a design is quite similar to working in Microsoft and Photoshop programs. But before you can get too crazy with your design, you will want to take a measurement of the area you plan to label. For this example, I was labeling a glass bottle that I use for making and storing our homemade fabric softener.

Knowing how much space I had to work with, I created the label design using the Silhouette Studio program. I used the Text tool, which opened a Text Style menu on the right hand side of the screen when selected.

Using the available settings, I was able to play around with a few different font styles and text sizes while also having the ability to change the character spacing. I generally design in the center of the screen and move things for cutting once my design is complete. The grid allows me to easily align and space my text.
Quick Tip: Select fonts that are thick/bold for a cleaner outcome. Thin and small fonts tend to be more delicate and run a risk of snagging during the cutting process.

Once you have your font(s) determined, you can select each font box to see how wide the cut area is (small measurements will appear on the screen when any object or font is selected). This is also the time when you will want to be sure that any connected cursive type font is welded together into a single cut. To do this, I select the word box, click Ungroup Selected Shapes and then click the Weld Selected Shapes button. You will see your word go from a choppy multi-cut font to a solid welded single cut font.

Now that the cursive font is sized and welded, you can select all of the label design elements and pull them to the area you wish for it to cut in your vinyl. I usually go for the top left corner to try and preserve my vinyl to reuse for future projects.
Prior to sending the job to the Silhouette, you will want to confirm your cut settings in the Cut Settings menu. Anything shown on the screen with a pink outline will cut into the vinyl. Here you can also select the type of material (in this case Vinyl) and the program will give you the proper settings for your blade based on the material selected. Above, you can see it recommended that I set my Ratchet Blade to a #1. You can adjust the number on your blade right within the machine itself. Shown below is the small arrow pointing to the number 1 on my blade. Once selected, back into the blade holder it goes for cutting.

On the Silhouette machine, you should see the option to “Load Cutting Mat” or “Load Media”. Load Media is the option you will want when cutting vinyl.

Use the blue guides on the machine to line up the vinyl, lift the bar with the lever, tuck the vinyl under the rollers and press the Load Media option on your screen. You may need to straighten the vinyl a bit prior to lowering the roller bar down to hold the vinyl in place.

Now you are ready! Nervous? Don’t be! You got this! Click that Start button and watch the machine work its magic!

A few minutes later and you will have yourself some freshly cut vinyl. Not quite as fragrant as fresh cut flowers, but equally as exciting!

There were a few little spots that didn’t cut 100% perfectly which might be the sign of a dull blade or an off-brand of vinyl or maybe not having the blade set to the right level. I don’t get too worried about small imperfections because they usually smooth out during the transfer process.
Speaking of transfer, now that the label is designed and cut, it needs to be transferred to the desired container.

To quickly and easily transfer the vinyl, you will need to use transfer paper (I typically prefer the lined/grid version but didn’t have any on hand for this tutorial). I also use a card, a hook tool and scissors or a paper slicer.
Cut your labeled area from the roll of vinyl with the scissors or slicer.

Peel back the blank area of the vinyl to expose your label.

You will notice that the smaller areas inside of the letters also need to be removed from the vinyl backing; this is where the hook tool comes in very handy.

Next, place your vinyl face down onto the transfer paper. If I don’t have a grid, I try to find a straight edge to pair up to. Use the card to press and smooth the transfer paper to the vinyl label.

Peel back the vinyl backing; the vinyl should now be on the sticky side of the transfer paper.

Stick the transfer paper to the surface to be labeled. If you lightly press the outer edges, you should have some ability to adjust it until it is right where you like it.

And when you are ready to commit, use the card again to rub and transfer the vinyl to your final surface.

Slowly peel back the transfer paper; the vinyl should remain on your surface. I have found that the tighter I bend the transfer paper back, the less likely the vinyl will pull away with it.

And you now have a surface beautifully labeled with vinyl!

The bottle was still feeling a little bare, so I added a floral embellishment that I downloaded from the Silhouette Online Store.

I also created a second label for our stain remover as well.

Why select vinyl for labeling? Here are a few reasons why vinyl is one of my favorite ways to label:
- Endless creativity! Vinyl gives me a lot of freedom to select a color, font, size, shape, pattern, etc.
- It is temporary! If I ever want to reuse a container or bin down the road, the vinyl just peels off like it had never been there to begin with.
- But it also stays put! Although vinyl is intended to be a temporary solution, it will stay put until you are ready to peel it away.
- It is washable! When I label items like my cleaning caddy, cleaning supplies and food storage bins, they tend to get dirty and need frequent washing. Vinyl is durable enough to be washed with soap and water without wearing away (I typically wash by hand but have thrown a food container through the dishwasher a time or two).
- It is easy! Although it feels like a lot of info and steps in this post, now that I know what I am doing, it only takes me a few minutes to whip up something snazzy.
Any other questions regarding how to cut vinyl with a Silhouette? If you are not looking to invest in the Silhouette machine, you can also cut vinyl with an X-Acto knife or paper punch! Check out an example of easy labels made with a decorative punch here.

I also can’t wait to also share how to use the Silhouette Print and Cut feature! It ranks right up there as a favorite way to use the Silhouette to create superfab labels for around the abode.
Are you now in the mood to label everything in sight? Check out more labeling tips and tricks shared in the rest of the Labeling 101 series below.
 |
 |
 |
Fonts used for labels in this post: C Avant Garde Std Bold | Dessert Menu Script | Futura
Floral Graphics use: Leaf & Flower Border | Floral Branch
from IHeart Organizing http://www.iheartorganizing.com/2016/01/labeling-101-silhouette-vinyl.html
No comments:
Post a Comment