Lately I have felt like our kids and our home have a bit of a technology problem. This year, our two older boys each acquired a small netbook as part of their school’s technology program. Our oldest also has his phone and our younger two an iPad. It is a bit ridiculous, and up until recently, all of the different items would pile up on our kitchen counter with a plethora of cords dangling and being tripped on. I know this is an eye roll of a problem, but at the same time, all of that counter clutter does become obnoxious on a daily basis.

But lucky for us, when we updated our kitchen, I had a small plan in my mind for this problem. I was hoping to eventually create a cabinet to conceal all of our charging electronics on a daily basis, in a location that was still easily accessible by everyone. While installing some cabinets in our dining area, we had an outlet added by our electrician to accommodate this little dream I had. But of course, it took us until now to finally finish this up.
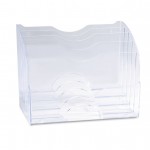
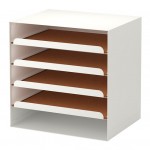
The IKEA cabinets that we installed in our dining area are about 11 ½" deep, so when it came time to finally decide how to set things up, I started running into a few obstacles. I ultimately found a tiered office organizer, which is generally designed for paper sorting, that had just enough slots and the right dimensions for the cabinet.

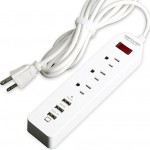
Once we finally started placing everything in the cabinet, the power strip and the organizer didn’t fit the way I had hoped, so we ended up creating a small shelving pocket to hold the strip and all of the bulky plug-in portions of the cords. We then fed the cords up behind the shelf, there was just enough space between the shelf and the backing that we didn’t have to modify the actually shelving at all.

As you can see in the photo above, I painted more foam core board the same lovely navy color I did in our recent coffee cabinet project (Ralph Lauren’s Iron Blue).
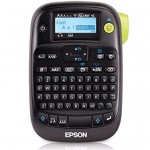
Prior to adding the electronics to the actual organizer, I whipped out my trusted label maker (paired with the clear tape and gold font of course), and created some labels for each slot.

From there, we just fed the cords into each slot through the back of the organizer, leaving enough slack that the electronic item could be pulled out and plugged in/unplugged without any trouble (the excess cord just rests on top of the item while charging).

It is not the most beautiful organizer in the world, but it works so incredibly well for us and is so simple for all three of the boys to use.
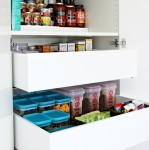
This cabinet is right below our handy dandy school supply drawer…

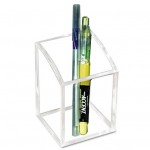
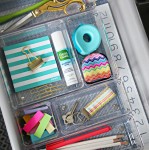
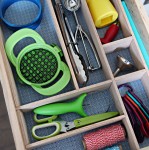
So this is now our new central command station area. It works so well being right next to our table where the younger boys work on their homework each evening. After we lost our wall pockets from our previous kitchen setup, we needed a new homework paper sorting system. I also wanted to add a few more bulkier school project supplies and a little stationery kit for myself. But first, I wanted to disguise that power strip section, so I hunted down two drawer organizers I had on hand and used them to hold a few extra cords for when we want to charge our phones near the sofa and some extra headphones. I also added a second pencil location because the school supply drawer has became over run with extra household pens and no one can ever seem to hunt down pencils at homework time.

To label the organizers, I used some blank Martha Stewart Avery labels paired with more label maker tape. It turned out to be a lovely combo!

I had already exhausted my budget for the cabinet on the charging slots, so I couldn’t stand to double it on paper sorters. Why are nice, wide, stackable paper trays so expensive? Lucky for me I have a handy hubby that dug through our garage of scrap wood and found just enough melamine boards to piece something together for me, free of charge.

I just added some scrapbook paper to the bottom of each slot, paired with a label holder and now each boy has a location to store their daily school reminders and papers. Thank you Mr. Jones!


To keep track of assignment due dates and sporting schedules, I printed off one of my free calendar pages (shared here) and clipped it to the inside of the door with a binder clip hanging on a Command Hook.

Add in a bin of extra coloring and painting supplies for art projects…

And a tray for my love of letter writing….

And this cute little school/charging station is where it is at for the whole family!

If you have been reading for awhile, you know I have tried just about every method for organizing incoming school work, and nothing works better than a single slot that is really easy to get at. The study boxes worked great for school supplies at homework time, but papers never stayed in that box and ended up in piles on our counter over time. I am thrilled to finally have a good solution in our new kitchen setup, that is allowing the kids to stay easily organized.
My husband is a tech guy for a living and I asked if he had any concerns about this setup and he said as long as the boys are shutting down their netbooks before putting them away, they will be fine charging here over night. And it is good for us to have a single place to check that each slot is full, and no sneaky little hands snuck an electronic device to bed with them. #thatwouldneverhappen #yeahright

Because I usually receive quite a few product source questions, below are a few of the items we used to make the most of this cabinet (similar items selected in case I couldn’t find our exact piece).
 |
 |
 |
 |
 |
 |
Of all of the cabinets I have organized in the kitchen, this one has benefited us more than any other. No more gadget counter clutter and easy systems for our boys to maintain is a double win here.
And if you enjoy looking at organized kitchen drawers and cabinets, you can catch up on all of our completed kitchen organization below:
 |
 |
 |
 |
 |
 |
 |
Have a great weekend my friends!
from IHeart Organizing http://www.iheartorganizing.com/2016/02/family-charging-station-cabinet.html
No comments:
Post a Comment